About Archive Tags RSS Feed


Entries tagged radio

Started work on an internet-of-things Radio

26 September 2017 21:50

So recently I was in York at the Bytemark office, and I read a piece about building a radio in a Raspberry Pi magazine. It got me curious, so when I got home to sunny Helsinki I figured I'd have a stab at it.

I don't have fixed goal in mind, but what I do have is:

  • A WeMos Mini D1
    • Cost €3.00
    • ESP8266-powered board, which can be programmed easily in C++ and contains on-board WiFi as well as a bunch of I/O pins.
  • A RDA5807M FM Radio chip.
    • Cost 37 cents.
    • With a crystal for support.

The initial goal is simple wire the receiver/decoder to the board, and listen to the radio.

After that there are obvious extenstions, such as adding an LCD display to show the frequency (What's the frequency Kenneth), and later to show the station details, via RDS.

Finally I could add some buttons/switches/tweaks for selecting next/previous stations, and adjusting the volume. Initially that'll be handled by pointing a browser at the IP-address of the device.

The first attempt at using the RDA5807M chip was a failure, as the thing was too damn small and non-standardly sized. Adding header-pins to the chips was almost impossible, and when I did get them soldered on the thing just gave me static-hisses.

However I later read the details of the chip more carefully and realized that it isn't powerfull enough to drive (even) headphones. It requires an amp of some kind. With that extra knowledge I was able to send the output to the powered-speakers I have sat beside my PC.

My code is basic, it sets up the FM-receiver/decoder, and scans the spectrum. When it finds a station it outputs the name over the serial console, via RDS, and then just plays it.

I've got an PAM8403-based amplifier board on-order, when that arrives I'll get back to the project, and hookup WiFi and a simple web-page to store stations, tuning, etc.

My "token goal" at the moment is a radio that switches on at 7AM and switches off at 8AM. In addition to that it'll serve a web-page allowing interactive control, regardless of any buttons that are wired in.

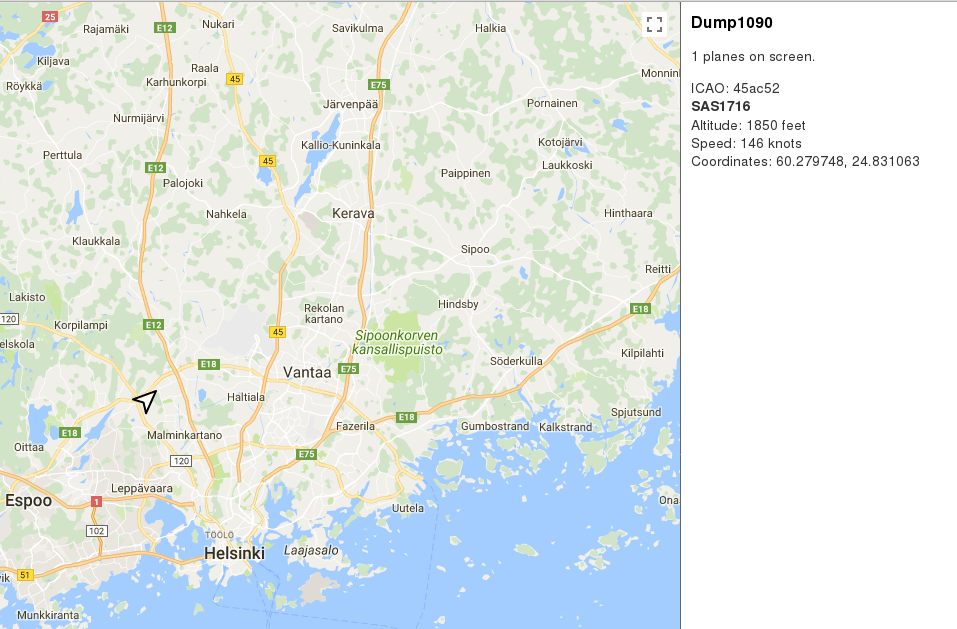
I also have another project in the wings. I've ordered a software-defined radio (USB-toy) which I'm planning to use to plot aircraft in real-time, as they arrive/depart/fly over Helsinki. No doubt I'll write that up too.

| 2 comments


Tracking aircraft in real-time, via software-defined-radio

5 October 2017 21:50

So my last blog-post was about creating a digital-radio, powered by an ESP8266 device, there's a joke there about wireless-control of a wireless. I'm not going to make it.

Sticking with a theme this post is also about radio, software-defined radio. I know almost nothing about SDR, except that it can be used to let your computer "do stuff" with radio. The only application I've ever read about that seemed interesting was tracking aircraft.

This post is about setting up a Debian GNU/Linux system to do exactly that, show aircraft in real-time above your head! This was almost painless to setup.

  • Buy the hardware.
  • Plug in the hardware.
  • Confirm it is detected.
  • Install the appropriate sdr development-package(s).
  • Install the magic software.
    • Written by @antirez, no less, you know it is gonna be good!

So I bought this USB device from AliExpress for the grand total of €8.46. I have no idea if that URL is stable, but I suspect it is probably not. Good luck finding something similar if you're living in the future!

Once I connected the Antenna to the USB stick, and inserted it into a spare slot it showed up in the output of lsusb:

  $ lsusb
  ..
  Bus 003 Device 043: ID 0bda:2838 Realtek Semiconductor Corp. RTL2838 DVB-T
  ..

In more detail I see the major/minor numbers:

  idVendor           0x0bda Realtek Semiconductor Corp.
  idProduct          0x2838 RTL2838 DVB-T

So far, so good. I installed the development headers/library I needed:

  # apt-get install librtlsdr-dev libusb-1.0-0-dev

Once that was done I could clone antirez's repository, and build it:

  $ git clone https://github.com/antirez/dump1090.git
  $ cd dump1090
  $ make

And run it:

  $ sudo ./dump1090 --interactive --net

This failed initially as a kernel-module had claimed the device, but removing that was trivial:

  $ sudo rmmod dvb_usb_rtl28xxu
  $ sudo ./dump1090 --interactive --net

Once it was running I'd see live updates on the console, every second:

  Hex    Flight   Altitude  Speed   Lat       Lon       Track  Messages Seen       .
  --------------------------------------------------------------------------------
  4601fc          14200     0       0.000     0.000     0     11        1 sec
  4601f2          9550      0       0.000     0.000     0     58        0 sec
  45ac52 SAS1716  2650      177     60.252    24.770    47    26        1 sec

And opening a browser pointing at http://localhost:8080/ would show that graphically, like so:

NOTE: In this view I'm in Helsinki, and the airport is at Vantaa, just outside the city.

Of course there are tweaks to be made:

  • With the right udev-rules in place it is possible to run the tool as non-root, and blacklist the default kernel module.
  • There are other forks of the dump1090 software that are more up-to-date to explore.
  • SDR can do more than track planes.

| 2 comments


IoT radio: Still in-progress ..

17 December 2017 21:50

So back in September I was talking about building a IoT Radio, and after that I switched to talking about tracking aircraft via software-defined radio. Perhaps time for a followup.

So my initial attempt at a IoT radio was designed with RDA5807M module. Frustratingly the damn thing was too small to solder easily! Once I did get it working though I found that either the specs lied to me, or I'd misunderstood them: It wouldn't drive headphones, and performance was poor. (Though amusingly the first time I got it working I managed to tune to Helsinki's rock-station, and the first thing I heard was Rammstein's Amerika.)

I made another attempt with an Si4703-based "evaluation board". This was a board which had most of the stuff wired in, so all you had to do was connect an MCU to it, and do the necessary software dancing. There was a headphone-socket for output, and no need to fiddle with the chip itself, it was all pretty neat.

Unfortunately the evaluation board was perfect for basic use, but not at all suitable for real use. The board did successfully output audio to a pair of headphones, but unfortunately it required the use of headphones, as the cable would be treated as an antenna. As soon as I fed the output of the headphone-jack to an op-amp to drive some speakers I was beset with the kind of noise that makes old people reminisce about how music was better back in their day.

So I'm now up to round 3. I have a TEA5767-based project in the works, which should hopefully resolve my problems:

  • There are explicit output and aerial connections.
  • I know I'll need an amplifier.
  • The hardware is easy to control via arduino/esp8266 MCUs.
    • Numerous well-documented projects exist using this chip.

The only downside I can see is that I have to use the op-amp for volume control too - the TEA5767-chip allows you to mute/unmute via software but doesn't allow you to set the volume. Probably for the best.

In unrelated news I've got some e-paper which is ESP8266/arduino controlled. I have no killer-app for it, but it's pretty great. I should write that up sometime.

| No comments


More ESP8266 projects, radio and epaper

6 January 2018 21:50

I finally got the radio-project I've been talking about for the past while working. To recap:

  • I started with an RDA5807M module, but that was too small, and too badly-performing.
  • I moved on to using an Si4703-based integrated "evaluation" board. That was fine for headphones, but little else.
  • I finally got a TEA5767-based integrated "evaluatioN" board, which works just fine.
    • Although it is missing RDS (the system that lets you pull the name of the station off the transmission).
    • It also has no (digital) volume-control, so you have to adjust the volume physically, like a savage.

The project works well, despite the limitations, so I have a small set of speakers and the radio wired up. I can control the station via my web-browser and have an alarm to make it turn on/off at different times of day - cheating at that by using the software-MUTE facility.

All in all I can say that when it comes to IoT the "S stands for Simplicity" given that I had to buy three different boards to get the damn thing working the way I wanted. That said total cost is in the region of €5, probably about the same price I could pay for a "normal" hand-held radio. Oops.

The writeup is here:

The second project I've been working on recently was controlling a piece of ePaper via an ESP8266 device. This started largely by accident as I discovered you can buy a piece of ePaper (400x300 pixels) for €25 which is just cheap enough that it's worth experimenting with.

I had the intention that I'd display the day's calendar upon it, weather forecast, etc. My initial vision was a dashboard-like view with borders, images, and text. I figured rather than messing around with some fancy code-based grid-layout I should instead just generate a single JPG/PNG on a remote host, then program the board to download and display it.

Unfortunately the ESP8266 device I'm using has so little RAM that decoding and displaying a JPG/PNG from a remote URL is hard. Too hard. In the end I had to drop the use of SSL, and simplify the problem to get a working solution.

I wrote a perl script (what else?) to take an arbitrary JPG/PNG/image of the correct dimensions and process it row-by-row. It would keep track of the number of contiguous white/black pixels and output a series of "draw Lines" statements.

The ESP8266 downloads this simple data-file, and draws each line one at a time, ultimately displaying the image whilst keeping some memory free.

I documented the hell out of my setup here:

And here is a sample image being displayed:

| 2 comments


Radio gaga, the odessy of automation

6 June 2019 12:01

Recently I wanted to monitor the temperature and humidity of a sauna. I figured the safest way to go would be to place a battery-powered temperature/humidity sensor on a shelf, the kind of sensor that is commonly available on AliExpress for €1-5 each.

Most of the cheap "remote sensors" transmit their data over a short 433Mhz radio-transmission. So I just assumed it'd be possible to work something out.

The first step was to plug an SDR-dongle into my laptop, that worked just fine when testing, I could hear "stuff". But of course a Sauna is wood-lined, and beyond a tiled-shower area. In practice I just couldn't recieve the signal if my laptop lived in its usual location.

So I came up with a fall-back plan:

  • Wire a 433Mhz receiver to an ESP8266 device.
  • Sniff the radio-transmission.
    • Decode it
    • Inject into an MQ-host, via WiFi

Since the receiver could be within 10m of the transmitter I figured that would work fine - and it did. The real problem came when I tried to do this. There are a few projects you can find for acting as a 433Mhz -> WiFi bridge and none of them understood the transmission(s) my sensor was submitting.

In the end I had to listen for packets, work out the bit-spacing, and then later work out the actual contents of the packets. All by hand.

Anyway the end result is that I have something which will sniff the packets from the radio-transmitter, correctly calculate the temperature/humidity values and post them to MQ. From MQ a service polls the values and logs them to SQLite for later display. As a bonus I post to Slack the first time the temperature exceeds 50 °ree; a day:

  • "Hot? It's like a sauna in here."
  • "Main steam on, somebody set us up the beer."
  • etc.

Next week I'll talk about how I had a similar (read: identical) problem reacting to the 433Mhz transmission triggered by a doorbell. None of the gateways I looked at logged a thing when the button was pressed. So I'll have to save the transmission via rtl_433, analyze it with audacity, and do the necessary.

For reference these are the three existing firmwares/solutions/projects I tried; on a Wemos Mini D1:

| No comments